What is Agiloop?
Agiloop is an AI-native platform that takes a software project from a rough concept (or an existing codebase) through to a production-ready application, and then keeps helping you improve it — with an AI-driven team acting as your business analyst, architect, and engineers along the way instead of a stack of disconnected tools. It organizes that work into four stages: INVENT (define what you're building, in a functional and technical spec), IMPLEMENT (turn that spec into working code), INSPECT (verify the result), and ITERATE (analyze the running project and keep improving it). This series is about the very first part of that journey: getting a project into Invent with a solid spec in hand. There are three ways to do that, and this article covers the fastest one — pointing Agiloop at code that already exists.
If you're a product owner or engineering lead who already has a working (or half-working, or "it works, don't touch it") codebase, the last thing you want to do is re-describe it from scratch in a requirements doc. You already have the source of truth. It's sitting in a git repo.
That's increasingly true even for teams that didn't start with engineers at all. A wave of AI app builders has made it trivially easy to go from an idea to something clickable in an afternoon — genuinely useful for proving out a concept. What they're generally not built for is what comes next: the part where real users show up, the data model needs to hold under load, and someone asks about security review. That gap between "it demoed well" and "it's production-grade" is exactly where Agiloop's repo analysis earns its keep.
Agiloop actually offers two starting points for a new project: a guided AI conversation (the "Interview," for when there's no codebase yet to point Agiloop at — more on that in Parts 2 and 3) and repo analysis, which skips that conversation entirely. Point it at a repository, and an AI analysis reads the code and produces a functional specification and a technical specification directly from what's actually there — not from what someone remembers building, or what the outdated wiki page says it does.
This article walks through that flow end to end: connecting a repo, what happens while Agiloop is "thinking," and what you get at the end.
Step 1: Choose "Start with Repo"
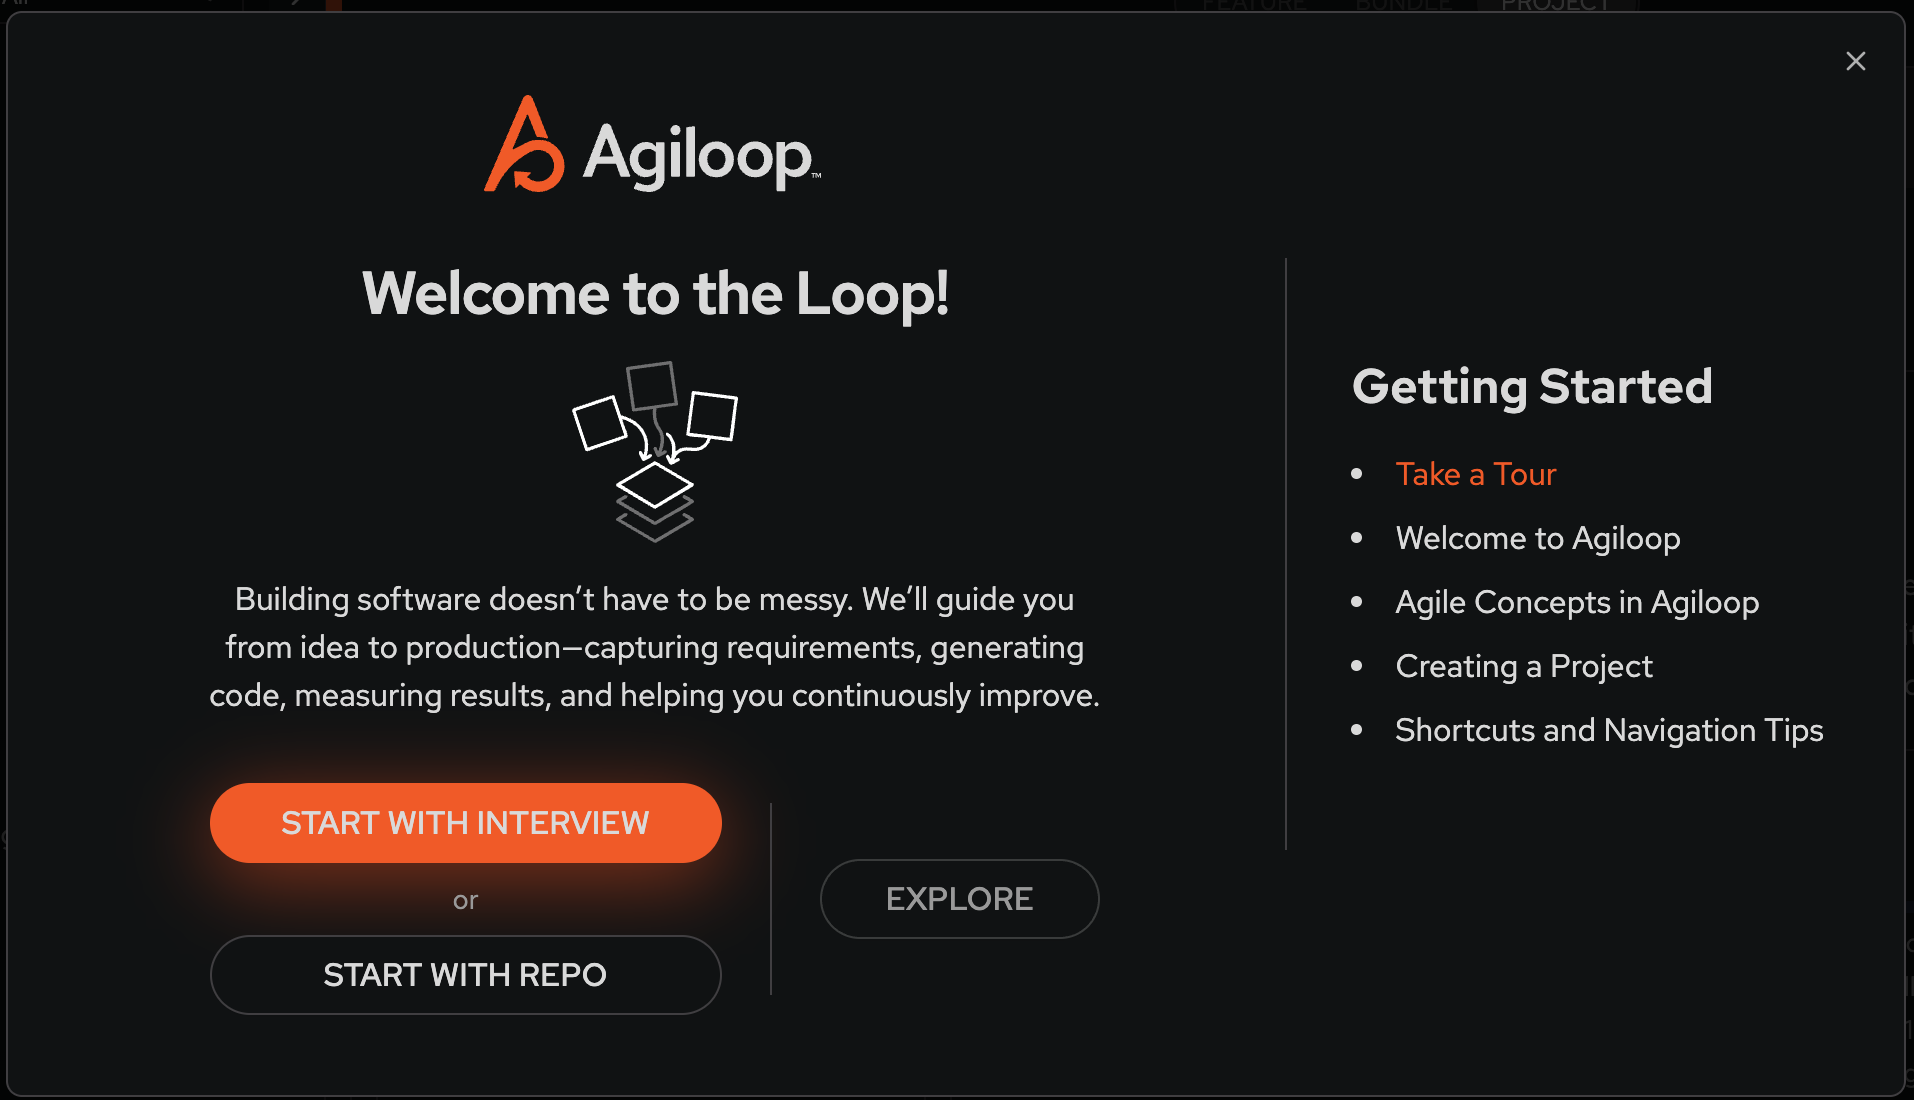
The first time you land in Agiloop with no owned projects, you'll see the "Welcome to the Loop" dialog. It offers two starting points side by side:
- Start with Interview — a guided conversation (covered in Parts 2 and 3)
- Start with Repo — the path this article covers
If you've dismissed this dialog already, you can reach the same flow later from the project menu — "Add project from repo" is always available, not just on day one.
Click Start with Repo.
Step 2: Connect your repository
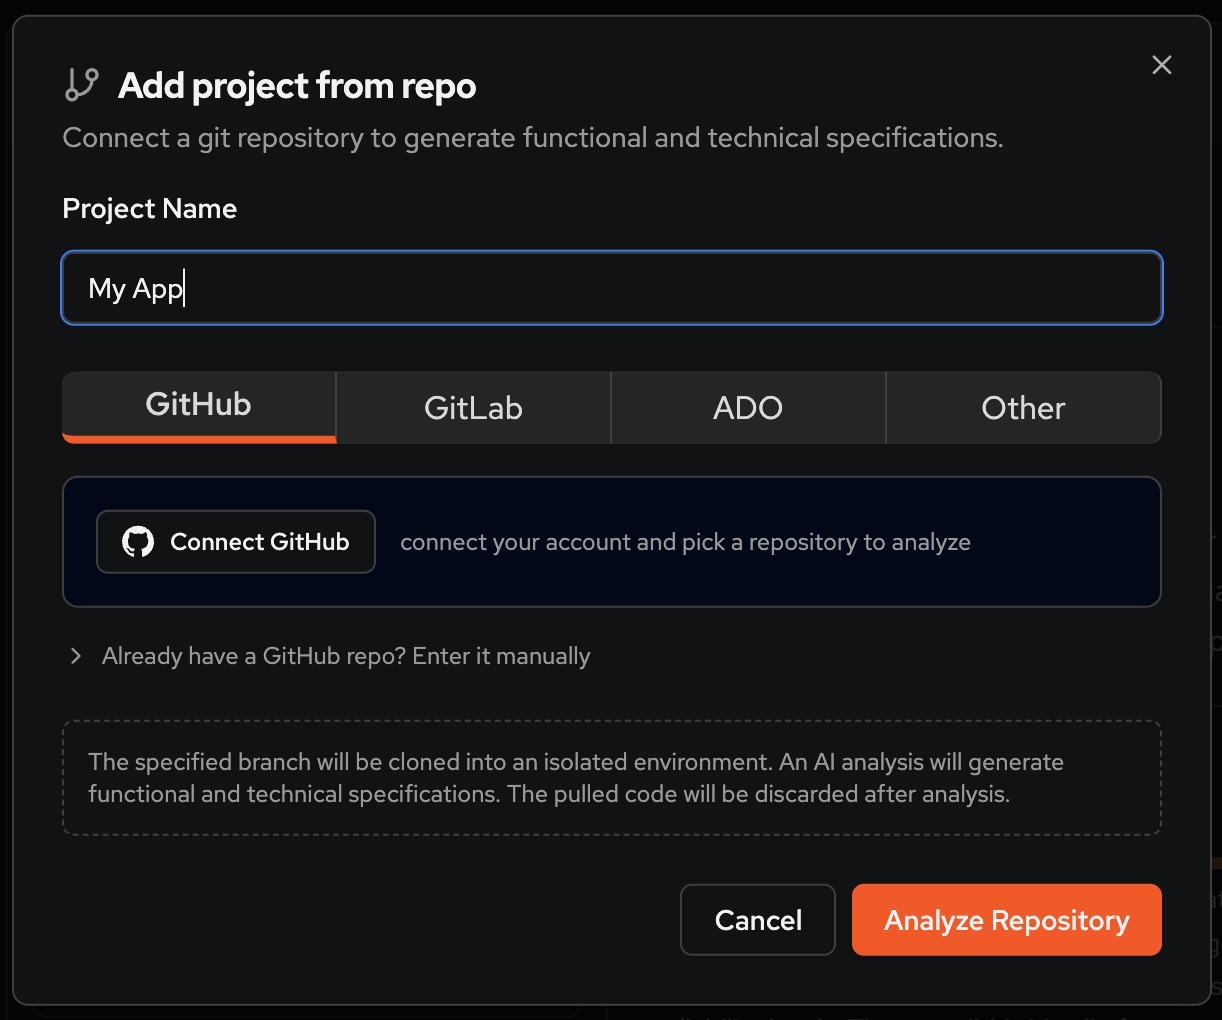
A dialog titled "Add project from repo" opens, with a short, honest description of what's about to happen:
Connect a git repository to generate functional and technical specifications.
You'll need two things:
- A project name — this is just Agiloop's internal name for the project; it doesn't have to match your repo name.
- A repository connection, via one of two paths:
- OAuth ("easy button") — sign in with GitHub or GitLab through a popup, then pick from a list of repos you have access to. (Note: in this onboarding flow, you can only pick an existing repo — Agiloop won't create a new one for you here.)
- Manual connection — paste a repo URL, choose the branch you want analyzed, and provide credentials (a personal access token, an SSH key, or an OAuth token depending on your provider).
A small disclosure under the form sets expectations plainly: the specified branch is cloned into an isolated environment, an AI analysis generates the specs, and the pulled code is discarded afterward. Nothing lingers longer than the analysis needs it to.
When you're ready, click Analyze Repository.
Step 3: Let the analysis run
This is the one step where you can genuinely walk away. The dialog switches into a live progress view with three phases:
- Cloning repository — Agiloop pulls a shallow copy of the branch you specified.
- Analyzing codebase — an AI agent reads through the repository the way a new engineer would on day one: tracing entry points, mapping data models, following the request flow — and writes up what it finds.
- Processing results — the generated specs are parsed and attached to your new project.
For anything beyond a scratch repo, this takes a few minutes. You don't have to babysit it — the dialog tells you plainly that you can close the panel and the analysis keeps running in the background. Reopen the "Add project from repo" screen (or just watch for a notification) and you'll pick right back up wherever it left off. If you change your mind partway through, there's a "Cancel analysis" option with a confirmation step, so you don't lose progress by accident.
Step 4: Land in your new project
When analysis completes, Agiloop creates the project automatically and opens it for you. What you land on is a functional specification and a technical specification, both generated from the actual code — not a guess, not a template.

From here, the project behaves like any other Agiloop project: you can review and edit the specs, break work into features, and start iterating.
The bonus: your repo keeps paying off
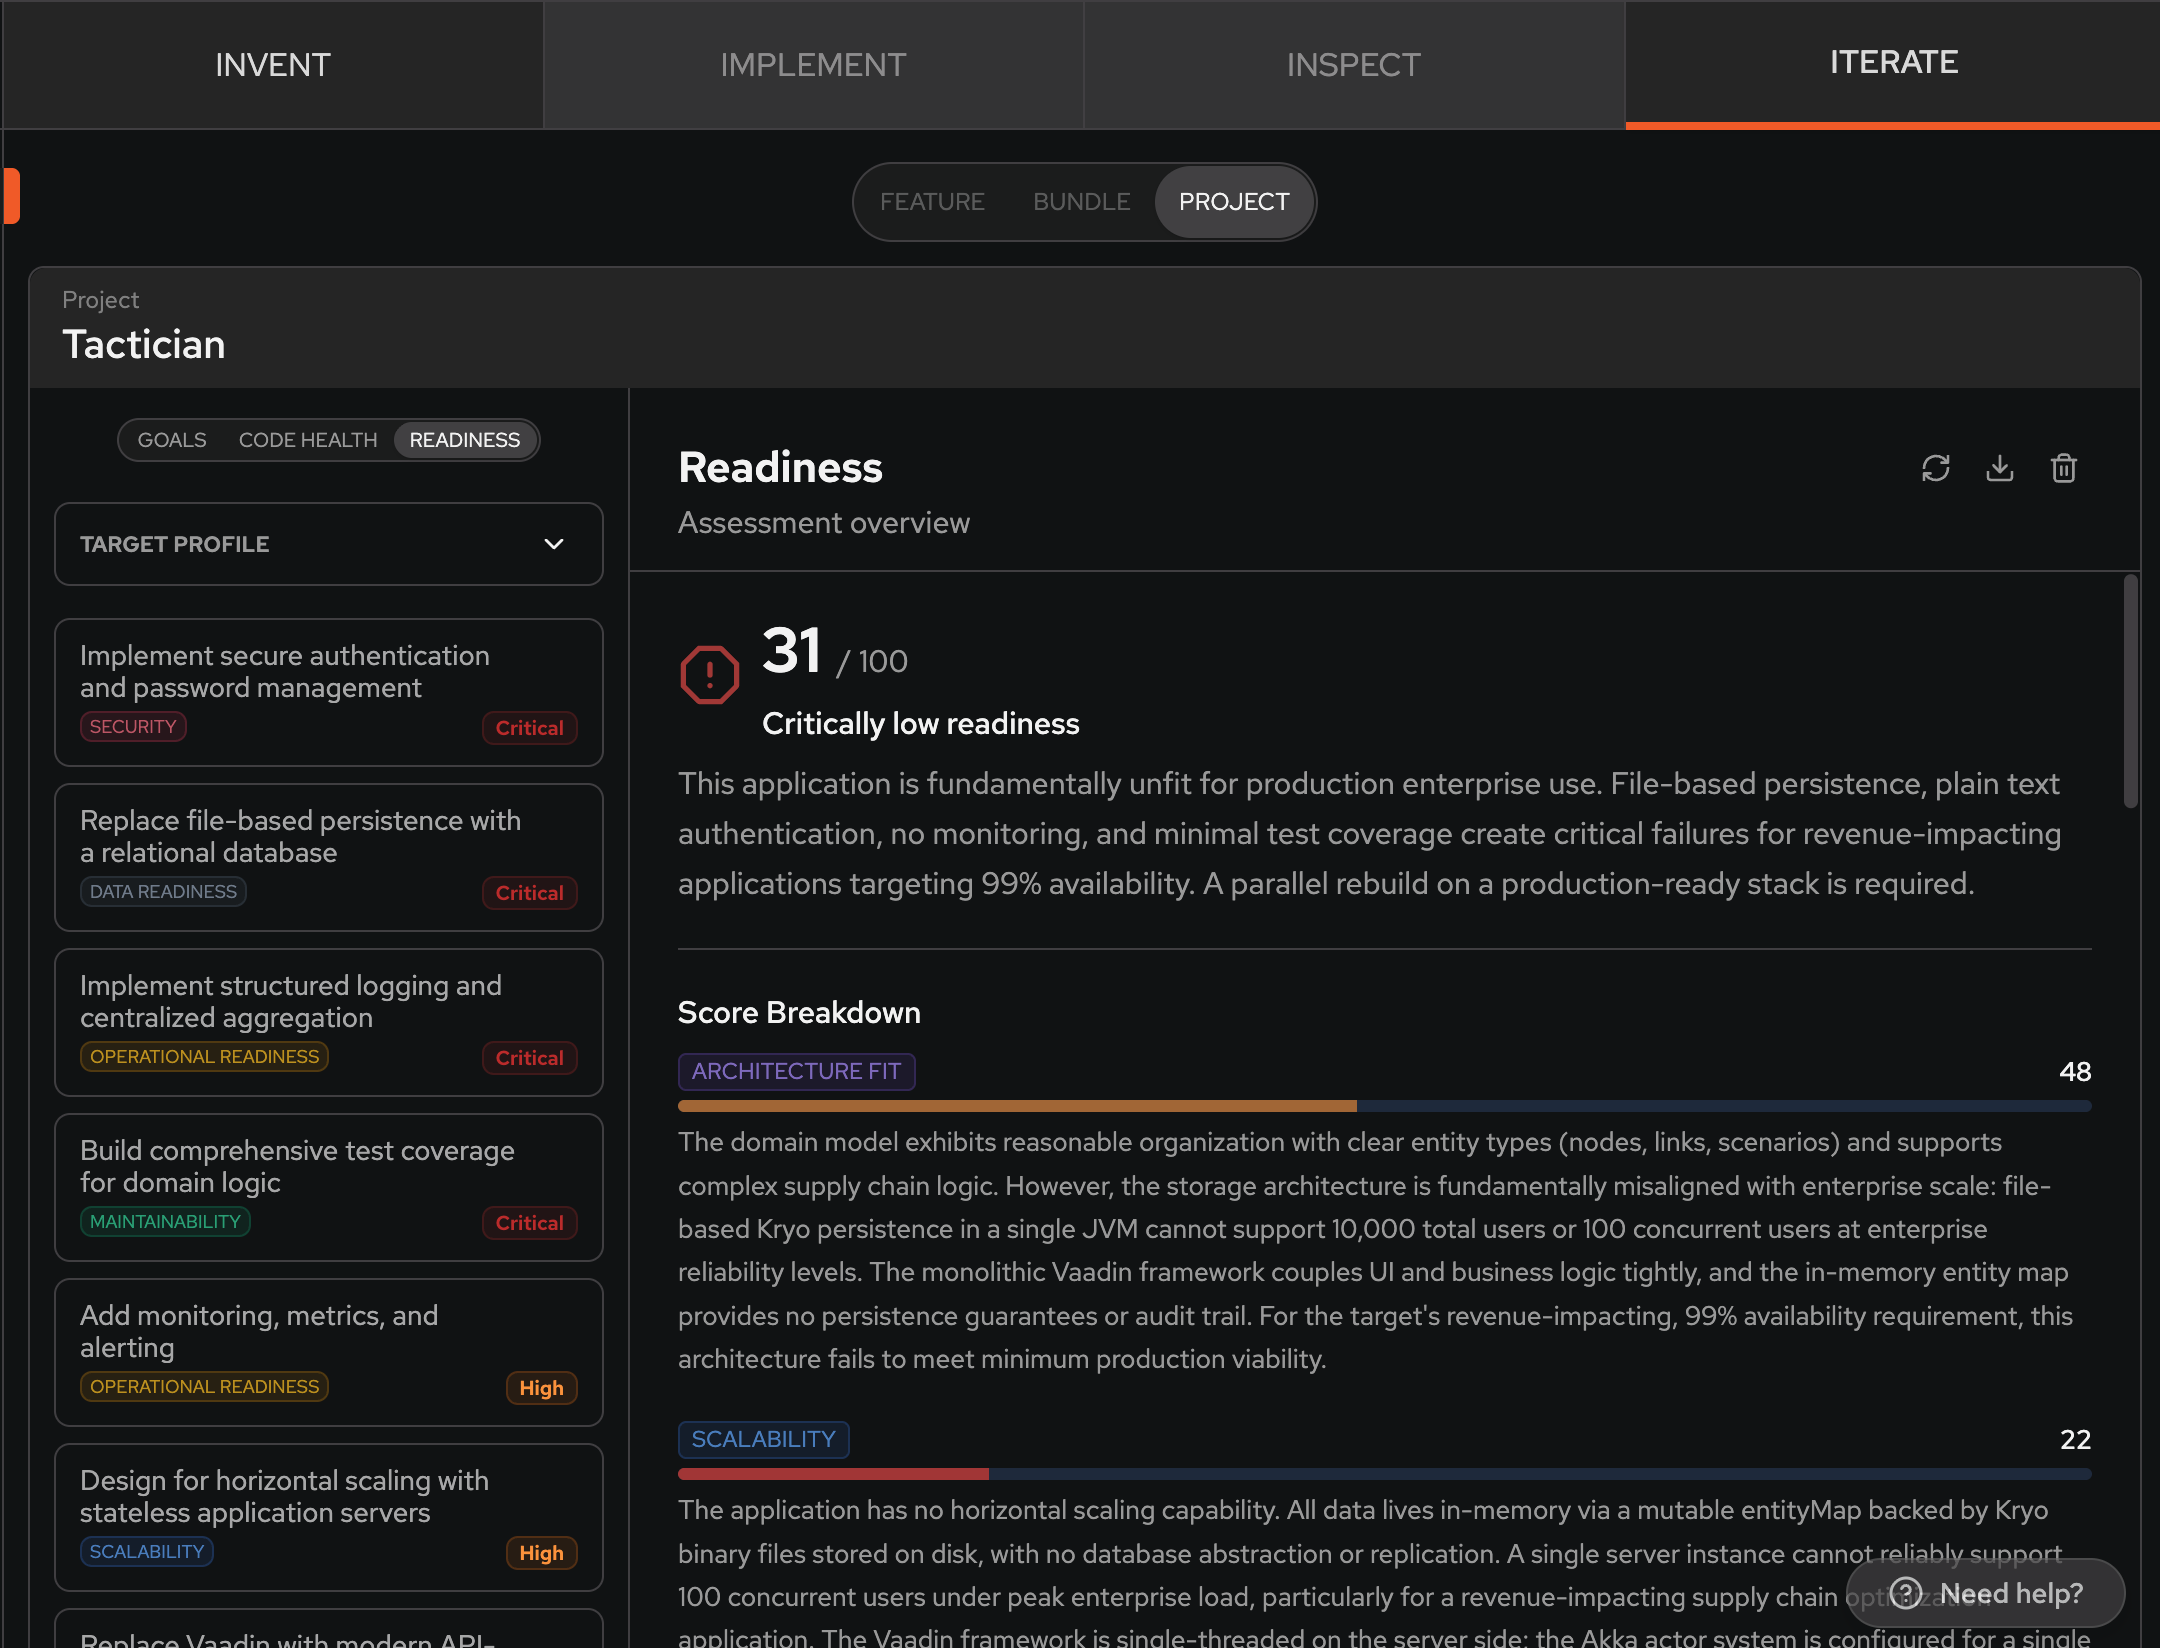
Connecting a real repository unlocks two ongoing analyses that a from-scratch idea simply can't get, because they both require actual code to examine:
- Code Health — an automated technical-debt scan that groups findings by category (architecture, code quality, testing, security, dependencies, DevOps, observability, documentation) and severity (critical, high, medium, low), each with a concrete recommendation you can turn directly into a backlog item.
- Readiness Analysis — scores your project against a target profile you define (expected scale, audience, compliance needs) across dimensions like scalability, reliability, security, and maintainability, and gives you a rebuild-vs-refactor recommendation with the reasoning behind it.
Both live in the project's ITERATE tab, and both can be re-run any time your codebase moves on. We'll cover them in depth in a future article — for now, know that they're there, and they only exist because you started with a real repo. If your codebase started life as a fast prototype rather than a planned build, Readiness Analysis in particular is the honest second opinion worth getting before you put real users on it: it'll tell you plainly whether you're looking at a solid foundation or a rebuild.
When to choose this path
Start with a repo when:
- The code is the actual source of truth, and any written documentation is stale or missing.
- You're evaluating a legacy or inherited codebase and need an honest read on what it does and how healthy it is.
- You've got a prototype that was built fast — by an engineer, a tool, or some combination of both — and need to know what it'll take to make it production-grade before you scale it.
- You want the fastest possible route to an accurate spec — no interview, no back-and-forth, just point and analyze.
If you're starting from a blank page with just an idea in your head, or you're describing a project that exists but isn't ready to be connected as a repo yet, the interview-based flows in Parts 2 and 3 are the better starting point.
Try it yourself
Ready to see what Agiloop makes of your repo? Learn more at agiloop.ai, or log in directly at agiloop.app and connect a repository in minutes.